Cornbread with Maple Syrup, Cream, and Cranberry Sauce

Monday, December 25, 2006

My grandpa gave me litre bags of wild Saskatchewan cranberries and blueberries when I drove east to visit last weekend. This was like getting bags of gold - wild cranberries have a deep, intense tartness. Due to car trouble I was a day late getting home and the berries were no longer frozen, so I've been eating blueberries and cranberry sauce daily.

This is a dessert for breakfast: cornbread soaked with equal parts cream and maple syrup, and topped with cranberry sauce. Please don't use the stiff, flavourless and overly sweet cranberry sauce in cans for this - if you need a recipe, Elise has a good one.

(The cornbread shown: Mix together 1 cup cornmeal, 1/2 cup whole wheat flour, 1/2 cup all purpose white flour, 1/2 tsp baking powder, 1/2 tsp baking soda, 1/2 tsp salt. Stir in 1/2 cup sour cream mixed with 2/3 cup water and pat into a nine inch square pan. Bake at 400 degrees F for twelve to fifteen minutes. You might have a better recipe; I didn't have any milk or eggs. I cut the bread into nine squares and used four, halved horizontally.)

Mix together 2 tbs cream and 2 tbs maple syrup in a wide shallow bowl and soak thin slices of cornbread in the sweet cream. Arrange cornbread on plates and top with 2 tbs of cranberry sauce each. Serves 2 for breakfast or a filling dessert.

Corn with Pimentón in Coconut Milk, for JFI-Coconut

Friday, December 22, 2006

This dish was inspired by a recipe I was reading for curried corn in coconut milk, and by a beautiful new can of pimentón.

Pimentón is an inexpensive seasoning that is well deserving of its growing popularity - it gives smokiness and depth to plain foods like cauliflower, potatos, and eggs; and takes dishes flavoured with cured meats into another dimension. I used bittersweet pimentón, but hot or sweet would also work. The mushrooms I, um, had in my fridge and needed to use. This took less than twenty minutes to make.

Wield a knife to make 1-2 tablespoons finely diced bacon or deli ends (I used a 3 cm piece of cured Italian sausage) and 2 tablespoons of finely diced mushrooms. Fry in a large saucepan until the mushrooms are soft and the fat has mostly rendered from the meat. You can omit the meat and just use extra mushrooms if you want. Add 1 1/2 cups of frozen corn (could use canned) and 3/4 tsp pimentón and fry together until heated through and tender. Add 3/4 cup of coconut milk, and simmer for a few minutes to blend the flavours. Taste for seasoning - the effect you are after is sweet corn and coconut balanced with smokiness and bite of pimentón - and serve to 2 with rice or bulgur.

The original curried corn recipe was in a paperback student cookbook called Students Go Vegan, by Carole Raymond. Student cookbooks are a great resource for less expensive and low effort recipes. This is my entry for JFI - Coconut, hosted this month by Ashwini at Food for Thought.

Apple and Lime Salad with Mint

Wednesday, December 20, 2006

Last week I was tossing grated apples into a pool of lemon juice for a cabbage salad, and tasted some of them. The apple was inspiringly good soaked in lemon juice and made me want to try a salad with just apple and lime juice, since lime brings out apple flavour better than lemon. The mint adds a cool note but is mostly for colour. Don't skip this salad if you have no mint - use parsley, or, in a pinch, grated carrot instead. (You could also experiment with things like fresh thyme and rosemary. Let me know if you try this; I like both herbs in cooked apple desserts but have never tried them with raw apple before.) This salad is bracingly tart, especially if your apples are not very sweet, so you can add sugar if desired.

Juice limes for about 2 tbs lime juice. Peel and grate two large apples into the lime juice. (Leave peel on if desired; I only had waxed apples so I threw it away.) Taste for sweetness and add sugar if desired. Julienne a dozen or so mint leaves, mix together, and serve to two or three.

Book Review: Meals Made Easy from Real Simple

Thursday, December 14, 2006

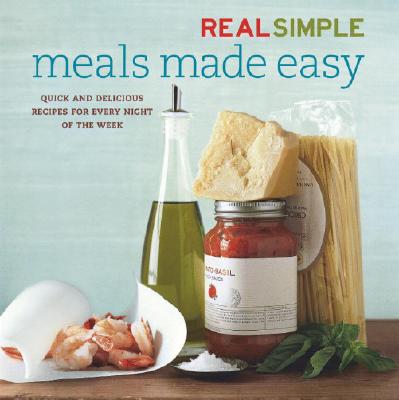
Real Simple has always seemed to me like a periodical with more style than substance - pleasant to peruse in the doctor's office, but not a magazine you'd make time to read regularly. However, their Meals Made Easy cookbook author's name caught my eye - Renee Schettler. While she was at the Washington Post, their online food section was my favourite of any newspaper, and I still search for her articles regularly. (Try searching for Avocado Smashwich. Simple and fabulous!)

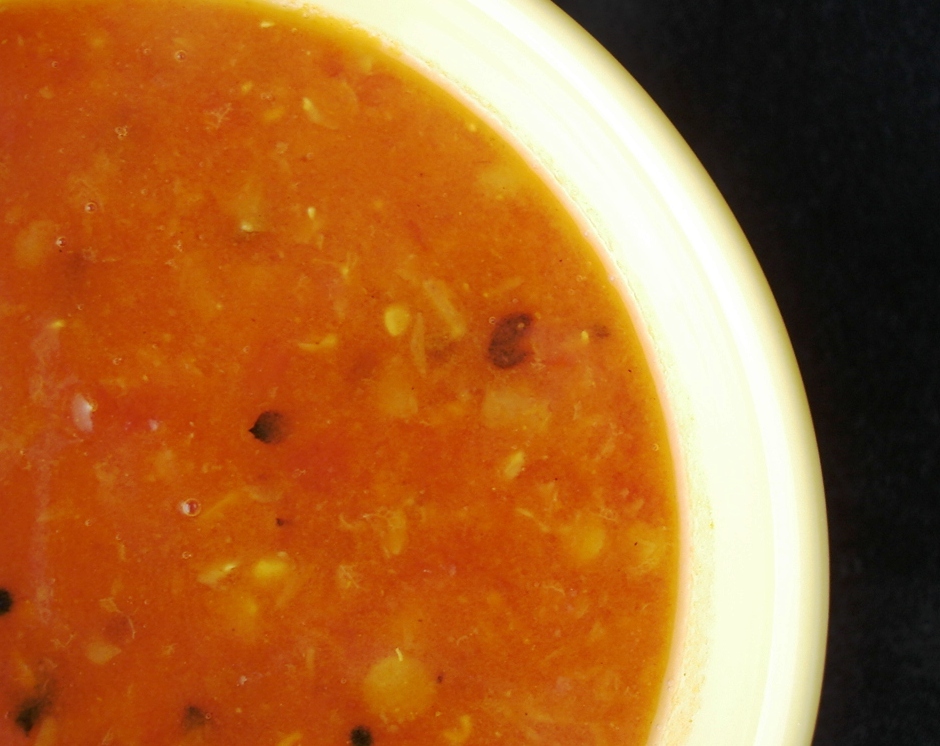
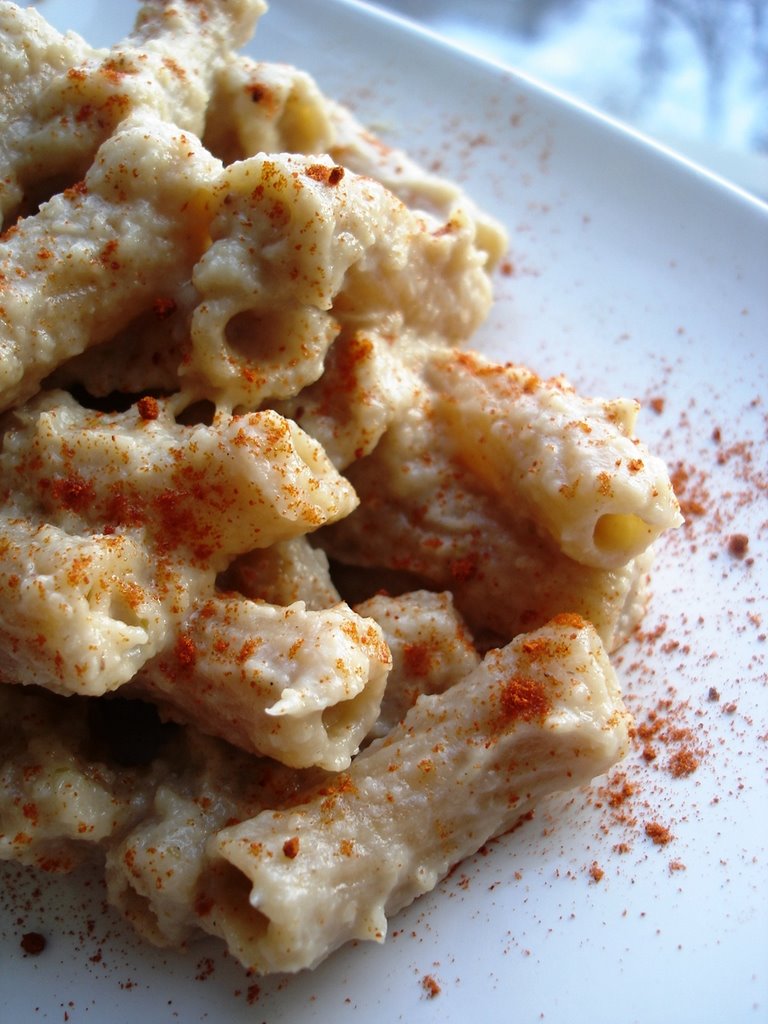
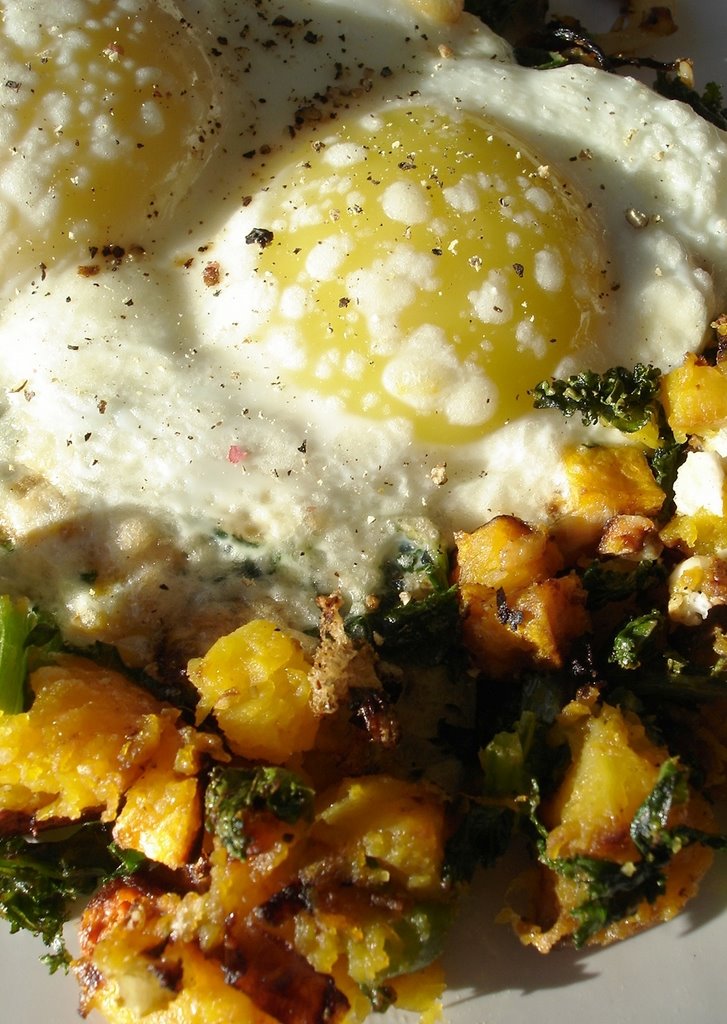
Physically, the book is gorgeous and every single recipe is illustrated in Real Simple style. The wide, heavy pages are suited to the rigors of kitchen duty and will not flip closed on you while cooking. The recipes are very easy both to skim and to cook, and there are cooking tips on each page that are useful both to the beginner and to experienced cooks. The recipes are arranged by effort: One-Pot Meals, 30-Minute Meals, Freezer Meals, and so on. I especially like the frugal-friendly and almost completely veggie No-Shop Meals section, which includes basic things like eggs in tomato sauce and quesadillas.

The cookbook's main drawback is that many of the recipes are, well, ordinary - all but the most beginner of cooks already have a pasta with bolognese, an omelette, and poached fish in their repertoire. Advanced or more adventurous cooks will find the book less appealing. Also, though the beautifully styled pictures really add to the appeal of the book, it would have greater value with fewer pictures and more recipes.

This is a good basics book for beginning cooks, or someone who is new to Canada/US and is interested in learning common home cooked food.

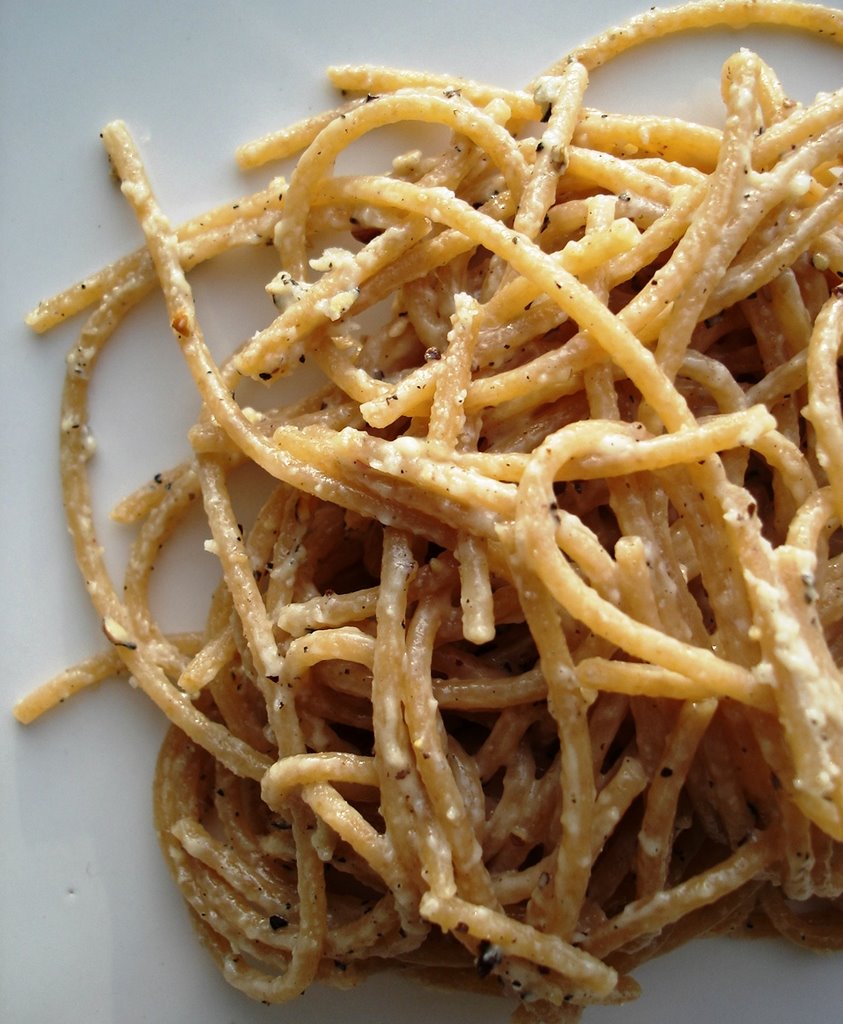
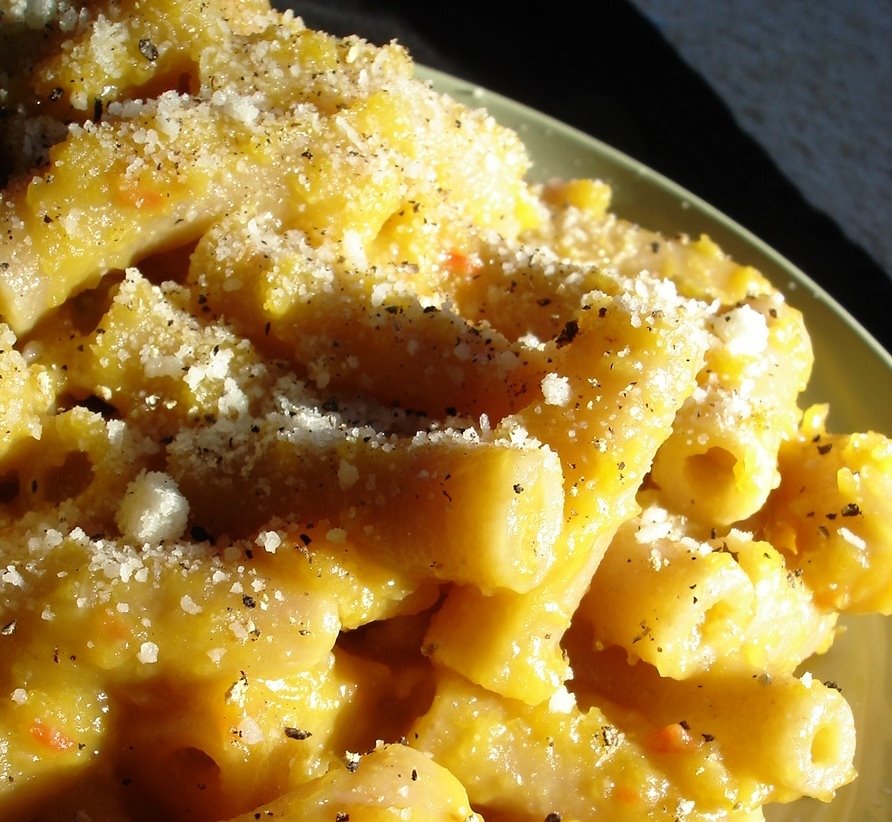
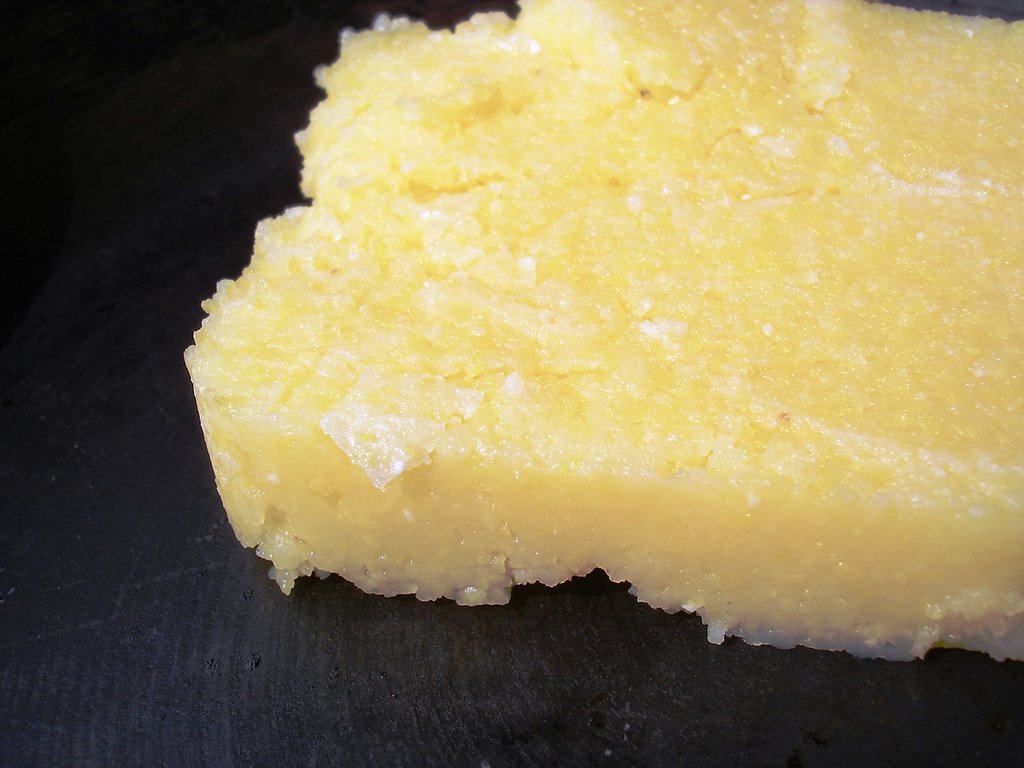
Crisped Leftover Pasta, adapted from Meals Made Easy

about 4 oz cooked spaghetti or fettucine, cold
2 tbs olive oil
3 slices proscuitto or 2 slices bacon (these were optional, so I left them out)
1/2 tsp red pepper flakes, (optional, I left them out)
1/4 cup grated Parmesan, plus more for serving
1/4 tsp kosher salt - (I omitted, since the cheese was already really salty)
1/8 tsp black pepper (I used more)

Let the pasta sit at room temperature until it becomes pliable, about 10 minutes. Meanwhile, heat the oil in a nonstick skillet over medium heat. Add the proscuitto or bacon if using and cook until crisp. Transfer to a paper towel lined plate. Drain off and discard all but 2 tsp of the drippings in the skillet. Sprinkle the red pepper flakes (if using over the remaining drippings. Increase heat to medium high. Add the pasta to the skillet and gently spread it out to form a large nest. Cook without stirring, until the pasta begins to crisp and brown on the bottom, 4 to 5 minutes. Sprinkle with the Parmesan and prosciutto or bacon if using. Cook, still without stirring, for about 2 more minutes. Season with the salt and black pepper. Slide or invert the pasta onto a plate and sprinkle with additional Parmesan. Cut into wedges, if desired.

Tip: store leftover spaghetti on a dinner plate covered with plastic wrap. This creates a perfect size nest of noodles that you can slide straight into the skillet.

Testing notes: This works best with white pasta, cooked a bit past al dente. It gets quite rich so is best served with something astringent, like cooked greens with vinegar or broiled tomatoes.

Cacio e Pepe, for The Spice is Right IX


The Spice is Right is one of my favourite food blogging events to follow, and I am really glad to finally join in for the Warm me up baby! It's cold outside... episode, hosted this time around at Rosie's Kitchen. What warmer spice exists than pepper? And Pepper is my handle. So, perfect. What to make? I had picked up some grated Pecorino Romano at the Italian Centre for a really, really good price, so the natural choice was spaghetti cacio e pepe, a recipe that was very in vogue a year or so ago. It is spaghetti with Pecorino Romano cheese and freshly grated pepper.

Bring a large pan of water to boil, salt it, and add spaghetti (whole wheat spaghetti is shown) for however many people you are serving. Mix together grated Pecorino Romano and pepper - about 2 tbs cheese and 3 grinds of pepper for one person and an additional tbs of cheese and grind of pepper for each additional person. This dish is easily wrecked with too much cheese (the salty element) or pepper, so add less to start. When spaghetti is nearly soft, drain, saving some pasta water, and mix the hot spaghetti with the cheese and pepper, adding water to soften the cheese into a sauce. Taste for flavour balance, adding more cheese or pepper if needed, and serve immediately.

Bloggers seem to love this dish, and I can understand why - the pepper and cheese are magic together. The very talented Orchidea has a gorgeous version, and Orangette also did a great post on it last year.

Spicy Tomato Lentil Soup

Tuesday, December 12, 2006

This soup tastes as warming as it looks and smells fantastic. You need 1/2 cup of red lentils (masoor dal), one can of tomatoes, and something to make it spicy. You can use 3-4 fresh tomatoes if you can get good ones right now - I can't. If you don't have these seasonings, use your own - a teaspoon (or more, taste as you go) of chili powder or curry powder would work. Don't skip the toasting step, even if you are using a powdered spice.

In a large saucepan, toast 1/2 tsp black mustard seeds, 1/2 tsp cumin seeds, 1 tsp coriander seeds, 1 tsp chopped fresh ginger, and 1 small dried red chili (or to taste) in 1 tsp oil over medium heat until seasonings are browned and fragrant. Add one 398 ml can of tomatoes (14 oz, I used Italian plum) and heat together for a minute or so, mashing tomatoes if they are in whole pieces. Add 1/2 cup red lentils and 2 cups of water, and 1 tsp salt and bring to a boil. Lower heat and simmer for half an hour until lentils are tender. Serves 3; I love it with grilled cheese sandwiches but any whole grain would complete the protein.

Rigatoni with Cauliflower Sauce and Paprika

Wednesday, December 06, 2006

Edmonton had deep freeze weather last week, and I felt like eating something rich and comforting. I remembered a spaghetti recipe with sauce made from cauliflower and cream, and decided to do a less expensive version using chicken stock. An aged Piave was grated into the sauce, but you can use any deeply flavoured cheese that will go with the cauliflower - cheddar would be fine. Cauliflower also loves paprika; use a hot or bittersweet pimentón (Spanish smoked paprika) if you can find it.

Cut up a medium head of cauliflower and roast on a baking sheet drizzled with oil until browned and tender in a medium oven. Use every bit of the cauliflower - there is no reason to throw away the core or green leaves. Meanwhile, saute half an onion and a few cloves of garlic - more if you love garlic - in a large saucepan until tender. When cauliflower is ready, scoop it into a blender with the onion, garlic, and one and a half cups of chicken stock, blending to make a thick, very smooth sauce. Add water or more chicken stock if the sauce is too thick to pour. Return sauce to the large saucepan and heat through. Stir 3 tbs grated cheese into the sauce, heat, and taste for seasoning.

Bring a large quantity of water to boil, add salt, and add rigatoni. (I used whole wheat rigatoni, which took eight minutes to cook.) Drain pasta, saving some of the water, and mix with the sauce, thinning with reserved pasta water if needed. Let sit for a minute, then dish up and sprinkle with paprika. This much sauce will work for about a pound of rigatoni or similar pasta shape, which feeds four to six.

Grocery Spending for November

Tuesday, December 05, 2006
Since some visitors have been dropping in via J.D. Roth's excellent Get Rich Slowly blog, I thought I would post my grocery spending over the past month. (This is shopping for one person who eats out about once per week.) Recording spending like this is a great way to get it under control, with a bonus of information about your eating habits. For example, I thought I spent 75% of my food money on fruits and vegetables, but it ends up being much closer to 50%. A lot of my diet does not appear on the month's snapshot - oats, soybeans, bulgur, flour and rice showed up a month or more ago.

My shopping trips are frequent, and rather than use a list I look for good values, often spending only a few dollars per visit. I try not to buy more than I can use up over the next few days, no matter how good some things look (this is tough). Also, even though my local big grocery store flyers are linked on my blog so I can study them weekly, I often end up going to smaller, more specialized places like the Italian Centre and H&W Produce. Someone who can grocery shop only once a week and needs to buy everything in one place will have a lot different shopping pattern than mine - you need to find what works for you.

Avocado, Grapefruit, and Pomegranate Salad

Sunday, December 03, 2006

I wanted to do a salad with citrus and pomegranate again, because the sweet-tart elements replace the need for dressing. My roommate left for a long weekend and told me to use up all her perishables, which included some things I don't often buy like grape tomatoes and avocadoes. Avocado and grapefruit get along really well in salads, so this was the result. You want to use really sweet grapefruit - if the fruit you have is very tart, you might want to add some sugar, particularly if you are feeding kids.

Cut the peel off of one grapefruit and dice, saving the juice. Dice one avocado, and gently mix fruit together, making sure avocado is covered with grapefruit juice. Place fruit carefully on two serving plates, sprinkling each salad with 1 tbs pomegranate seeds. (Yellow pomegranates, if you can find them, would be really beautiful here.)

Cha zuke

Thursday, November 30, 2006
Here is episode two in this week's rice theme. Rice with tea is as natural as cereal and milk, and good for mornings when you want something less filling. All you really need is rice and green tea, but use a garnish if possible. I had some sheets of nori and tiny dried shrimp, but you could use things like furikake or gomashio or just sesame seeds.

Mound leftover rice in a bowl and sprinkle with dried shrimp and nori, if desired. (You can use cold rice but I like to warm it up a little first.) Pour hot green tea into bowl and serve.

Onion Fried Rice with Peas

Tuesday, November 28, 2006

At the eleventh hour I found out about Onion Day via Cream Puff and knew I had to participate. Nothing turns up under my knife more often than onions - usually the strongly flavoured yellow kind, but very frequently green onions or red. Here, they are the main flavour note in fried rice.

Cooking a pot of rice on the weekend makes the rest of the week's meals ten times easier - you can use rice in various really good and satisfying things that don't take much time, like mujadara or risi bisi. Fried rice is one of those quick and infinitely variable dishes. Many people think of fried rice as an Eastern dish and season accordingly, but I prefer it with things like grated cheese stirred in to get all melted and toasty and fresh herbs like sage or thyme. This is a more basic version, however.

Quarter one small onion, or half a medium, and cut in julienne. Brown onions over medium heat with a touch of salt to draw out the juices, using butter or oil. When onions are nearly caramelized add 3/4 cup of cold cooked rice, and fry, stirring occasionally, until rice is very fragrant and is forming lots of crusty pieces. Watch that the onion does not burn. Meanwhile, microwave about 1/3 cup frozen peas until they are tender. When rice is done add peas and a few grinds of pepper. Continue to saute for a minute or two, taste for seasoning, and serve.

Tag: Onion Day

Shaved Beet Salad with Pickle Juice Vinaigrette

Thursday, November 23, 2006
The Italian Centre had bags of small beets, about 2 kg, for two dollars last week so I grabbed one bag and roasted them as soon as I got home. As I removed the skins, I wondered what I should do with them and popped one into my mouth. It had intense, earthy-sweet flavour. Inspired by a salad on Epicurious, I stacked caramelized onions and shaved beets on goat cheese with a vinaigrette. The salad photographed beautifully, but the beets overshadowed the other ingredients so much I decided to simplify things a bit and just toss the shaved beets in the vinaigrette.

I used the juice from the pickled onion recipe as a base for the vinaigrette. Any juice from sweet-tart pickles should work - just taste as you go. If you don't have pickle juice, use a mild or flavoured vinegar that is a bit sweet - a raspberry vinegar would be fantastic.

Shave 6-8 small roasted peeled beets with a mandolin, or slice very thinly with a knife. For vinaigrette, mix 3 tbs pickle juice with 1 tsp Dijon mustard and add salt and sugar, if desired, to taste. When you have the flavour balance you want, whisk in 2 tbs oil. Toss beets carefully with vinaigrette - they will soak it up immediately, because they are so thin - and serve.

Eggs Cooked on Top of Things

Monday, November 20, 2006
This is for those days when you can take time for breakfast. It started out as a way to make leftovers more like morning food - heat them first in a cast iron pan, and cook eggs on top with a sprinkle of cheese so the yolk makes a rich sauce for whatever is underneath.

(The name's vagueness is partly due to my early morning lack of imagination and partly because the dish is so variable - this time, the things are squash and kale. Last time, they were tomatoes and green onions. The time before that, potatoes and methi.)

For wetter things, like spinach with garlic or like my tomato and green onion combo, you can put the lid on top of the pan and baste the eggs. For a base with less moisture, like this squash and kale combination or potatoes, it is easier to finish the eggs under the broiler or the things can burn before the eggs are cooked.

For squash and kale things, shown: Mince 1 clove garlic and half a small onion and saute over medium high heat in a tablespoon or so of oil until softened. Add 3/4 cup cooked diced squash and a couple handfuls of chopped kale. Add salt and pepper and saute until all is heated through and the squash is browned in places. Flatten everything down in the pan, lower heat slightly, and break two eggs overtop. Sprinkle with 1 teaspoon of parmesan cheese, if desired, and cook until eggs are starting to firm on the bottom. Move pan underneath a low broiler and cook carefully until eggs are done to your taste. Finish with a grind of pepper.

Squash Seed Candy

Thursday, November 16, 2006

Never, ever, will I ever throw out squash seeds again. These are from a butternut, and I decided to save and toast them while I was waiting for the main course to steam. I was alarmed, and then delighted, when they started to crack like popcorn in my toaster oven. They were good by themselves but I wanted to do something sweet with them, and stirred the toasted seeds into some caramelized sugar. There is an acorn squash sitting on my counter with more of these treasures inside, and next time I will probably do something different - there are gorgeous recipes for pumpkin seed brittle out there that looks like stained glass. Or I might prepare them like the candied nuts. This is my first attempt:

Spread seeds from one butternut in a single layer on a pan and toast in a medium oven until some of them begin to crack. Let seeds cool and, over medium high heat in a small pan, carmelize 1/4 cup demerara sugar until it is liquid and bubbly. Spread out a sheet of foil. Stir squash seeds into sugar and pour quickly onto foil. Cover with another layer of foil and carefully squish thin with a rolling pin as the foil is quite hot and the candy will harden very fast. Let cool, remove foil, and break into pieces. If you don't eat them right away you should keep them in an air tight container; they will soften and get tacky if you leave them out.

Fen Zheng Rou

Monday, November 13, 2006

This wonderfully comforting dish of meat steamed with broken toasted rice I first spied in my current favourite Chinese cookbook, Land of Plenty. The book's version was called Fen Zheng Niu Rou ('niu' meaning beef) - so intriguingly unlike any Chinese dish I knew that I had to make it. Besides the rice, the recipe called for beef marinated in fiery bean sauce and lots of Sichuan pepper to finish. The melting texture contrasted gorgeously with the intensity of the seasonings. Not one week later, a Chinese friend served me a luxurious but milder version, made with pork belly and mushrooms, which I liked even better.

This recipe needs some advance work; the meat has to marinate, and the dish also needs at least a couple of hours to cook with steam (which the bone dry winter air at my place just slurps up). The long, slow, moist cooking suits less expensive cuts of meat - you can use lamb as well as beef or pork, or ribs if you find the richness of pork belly overwhelming. You can also use less meat and try adding some soaked dried mung beans. About half an hour before the meat is done, you can slip some squash, carrots, or other vegetable on top of the bowl in the steamer to cook at the same time.

In advance: Cut 1/2 to 1 lb of pork belly, with skin if possible, into thick one-inch strips and place in a plastic bag or other marinating container. Splash with 3 tablespoons of soy sauce and a couple tablespoons of Chinese cooking wine or sherry, and leave to marinate for a few hours. Toast 2/3 cup of rice over medium heat with two star anise in a dry pan as rice turns opaque, then brown. When rice is toasty but not burned let cool, reserving star anise. Grind rice in a blender to the texture of couscous. Soak 3-4 dried shiitake mushrooms, and soak a couple of handfuls rinsed dried mung beans if you are using them.

When you are ready for steaming, remove meat from marinade and toss with toasted rice, reserved star anise, drained mushrooms, and drained mung beans if you have them. Place in a glass or stainless steel bowl inside a large pot fitted with a steamer and steam for 2 to 2.5 hours until meat is very tender, adding water to the pot if necessary. Taste for seasoning balance and sprinkle with green onions and sesame oil before serving.

Book Review: The Scavenger's Guide to Haute Cuisine, by Steve Rinella

Thursday, November 09, 2006


This is the story of Rinella's year-long quest to gather ingredients for a three day feast for several of his friends and family using recipes from Escoffier's Guide Culinaire. The highly engaging narrative is full of knowledge about hunting and dressing fish and animals that would have been common knowledge a generation or two ago but is now fast disappearing, and tracking down the variety of beasts on the menu requires the author to learn quite a few new tricks. We are also given glimpses of Escoffier's brilliance, which seems to have transformed Rinella's frame of reference on cooking and food. The project is a tribute to Escoffier and also to Rinella Sr, who had acquired a taste for haute cuisine in France during the war and who sustained it mostly by his own hunting and fishing after returning to the US. The meal is also a final attempt to convince a hunter's vegetarian girlfriend to become a meat eater.

The term 'scavenger' in the title I found misleading, since a scavenger lives off what others have left behind and Rinella is all over the continent pursuing and gathering the game. There was thus less to learn from a frugal perspective than I expected, particularly since my own diet has been going more and more veggie. The book did help me recognize that there are all kinds of ways to obtain and prepare food, and resourcefulness in acquiring foodstuffs combined with deep understanding of ingredients and preparation can result in some of the most creative and satisfying cooking and eating.

Weekend Cookbook Challenge #10: Lefse

Friday, November 03, 2006

My usual tactic is to get rid of things I don't use, so I hadn't planned on participating in the Neglected Gadgets episode. Then, with some leftover mashed potatoes in the fridge, I spotted my mom's lefse rolling pin - something I don't generally think of as a kitchen implement, but more as a supporting structure in my family's culinary architecture. And I had not made lefse for ages. (You can buy lefse locally at specialty grocery stores or at the farmer's market, outrageously priced even for frozen lefse. And they are rather thin and pale - I like it a bit thicker, with a good browned flour char.)

This is one of those dishes I always make without a recipe, but I looked through my cookbooks none the less. Could have sworn there was a lefse recipe in our family reunion cookbook, but couldn't find it - then figured that most of us would think it was too simple for a recipe anyway. I did find two recipes in a collection from Whispering Pines Place, a lodge in Canwood, SK where my great grandmother used to live. One of the recipes called for eggs and baking powder, which I though quite odd - more of a potato pancake recipe, though it would be nice and tender and need less flour. The other recipe is written as a poem that starts with Yew tak yust ten big potatoes...probably politically incorrect to copy the whole thing. I ended up calling my mom about it. Leftover mashed potatoes (we always made them with milk), flour, salt, nothing more - you don't want potatoes made with too much milk, because then you have to add more and more flour.

I kneaded about 1 cup of flour (by 1/3 cups) into about two and a half cups mashed potatoes warmed to room temperature, til the dough was smooth and held together. After letting the dough sit for about ten minutes, I used the lefse rolling pin to shape lefse that would fit my 8 inch cast iron pan, using lots of flour and turning them so that the dough would not stick - a lefse rolling pin is a royal pain to clean if dough is sticking in the grooves. I then browned them on both sides in a dry frying pan over medium high heat. The generous amount of flour prevents the lefse from sticking to the pan as long as you don't burn them. The garlic and goat cheese from the original mashed potato recipe came through but not as strongly as I'd hoped, so I would try using less flour next time. I at first thought the mashed potatoes had plenty of salt, but ended up adding some to the dough after tasting the first cooked lefse. I ate these very untraditionally, with chunky harissa and sour cream and roasted eggplant. We always ate them at home just with butter, and sometimes sugar and cinnamon.

Anyway, I am happy that this edition of Weekend Cookbook Challenge led to my rediscovery of the lefse rolling pin. I am going to use it to give some surface texture to my latest favourite blog recipe, Nic's wheat crackers.

This episode of Weekend Cookbook Challenge is brought to you by Mary of The Sour Dough and Sara of i like to cook.

Mashed Potatoes with Herbs and Cheese

Thursday, November 02, 2006

Today is a grayish, -5 C day with a wind that makes it feel ten degrees colder. But I am at home with laundry in the dryer, a big batch of chicken stock in the oven, and a plate of mashed potatoes.

These rich and flavour packed potatoes are an extravagant side dish, but a frugal main course. (Once I did make a simpler, herb free version with lebnah instead of cheese to go with Sam's Boozy Bangers and Mash. Highly recommended.) My favourite way to cook potatoes right now is the microwave, with the dried herbs and salt. Fresh herbs, if you are using them, shouldn't be added until after cooking the potatoes. Whole potatoes are used here because, besides being less trouble than peeling them, the skins are full of nutrients and the things are delicious. I like the potatoes dry with some texture but if you want them creamier you can stir in some hot milk or hot water.

Dice 3 medium potatoes and 2 cloves of garlic - more if you really love garlic. Sprinkle with 1 tsp salt and 1 tsp thyme (or other dried herb that will complement the cheese you are using) and microwave covered for about six minutes, depending on your microwave. Mash hot potatoes immediately to the desired smoothness and add cheese - up to 2/3 cup if you are using a milder cheese. I used 1/2 cup of goat cheese. When everything is mixed together, taste for salt and seasoning and serve with butter.

Recipes for carb rich, intense main courses often come with airy instructions to serve with a green salad. Salad is not quite the thing here, unless you eat it separately as a starter. You could saute some greens, or make something like the onion and pepper stir fry, or roast some asparagus.

Weekend Cookbook Challenge #10 Teaser

Wednesday, November 01, 2006

The theme of this month's challenge is Neglected Kitchen Gadgets. (Cue mysterious music...) Originally from northern Europe, I am the star of Pepper's forthcoming post...who am I?

(Any guesses can be left in comments.)

Whole Wheat Ziti with Butternut Sauce

Monday, October 30, 2006
Pasta with tomato sauce feels a bit too familiar at times. I was trying to find some more interesting vegetable sauces for pasta, and some fiddling with the Google translate tool to make sense of 'pasta e zucca' recipes inspired this satisfying and gorgeous plate of ziti with butternut sauce. Other pasta shapes like rotini or rigatoni would enjoy this sauce as well; if you have smaller pasta or a fine noodle like vermicelli you will want to do a thinner, smoother sauce that will not overwhelm the pasta.

This is a recipe that accomodates what you have on hand - you could easily omit the pepper, or add small amounts of other vegetables like corn, carrots, celery, or tomatoes. Coriander is my favourite seasoning with squash right now, but cloves, nutmeg, cumin, cinnamon, or ginger would all work. Just do not overdo the seasoning - it is very easy for these bold spices to overwhelm the delicate flavour of the squash. If you have cooked squash on hand you can start the water boiling for the pasta, make the sauce, and have everything ready by the time the pasta is cooked.

Cut one small onion, one small sweet pepper, one jalapeno, and two cloves of garlic and saute in one tbs of oil with some salt and 1/2 tsp coriander until softened. Blend vegetables with half a medium cooked butternut squash, adding 1 1/2 to 2 1/2 cups of liquid to make a thick sauce. I used milk and pasta water for the liquid, but you could also use stock, or if you want a really luxurious sauce you can use cream. The amount of liquid you need will depend on how you have cooked the squash - if it is boiled, you will need less than if you roasted the squash. Pour/scrape sauce into a large pan, simmer for a few minutes, and taste for seasoning.

Meanwhile, cook a pound of whole wheat ziti to the desired texture and pour drained pasta into the simmering sauce. Mix pasta into sauce, adding some pasta water if mixture is too thick, and let sit for a minute so they can get to know each other. Turn out onto plates and top with grated parmesan and, if the jalapeno is not asserting himself enough, a grind of pepper. Serve immediately to four to six people.

Orange and Pomegranate Salad with Pickled Onions

Wednesday, October 25, 2006

This is a simplified version of a salad in Deborah Madison's The Savory Way, one of my most loved cookbooks. The original recipe includes pistachios and a kind of deconstructed vinaigrette - a separate drizzle of oil and vinegar or pomegranate juice. The nuts and oil would add a good bass note to round out and ground the dish, but even without them the flavours of this salad work amazingly well together - I love the pomegranate seeds with the onion.

You need a bit of planning ahead in order to make the pickled onions. Deborah Madison's pickled onion recipe appears in other cookbooks of hers as well, and is a great standby. The only thing I change about them is to add a few whole spices.

Pickled onions: Slice one medium red onion into very thin rings and sprinkle with about 1 tbs of sugar; cover with vinegar and add a couple of whole cloves or allspice. You can use the onions after about 20 minutes, but if you are using the spices it takes a week or more for the flavours to develop. Keep in a closed container in the fridge.

Salad: Cut peel off oranges and slice into rounds. Arrange orange pieces on a plate and put rings of pickled onion on top; scatter with pomegranate seeds and serve. Use one small to medium orange for each person you are serving. One pickled onion and one pomegranate is enough for several servings.

Pepper and Onion Stir Fry

Sunday, October 22, 2006

This very basic, almost non-recipe has fed me so many times over the last few months that I finally decided it deserved a post - onions and peppers, stir fried with a small amount of meat. The idea is to use a strongly flavoured cured meat with a lot of fat - I buy deli ends of things like capicolli and salami, but a piece of smoky bacon would work as well. If the meat I have is too lean I start it in a warm pan with oil and cook until the oil has absorbed some of the flavour. You want to cut all the elements into similar sized and shaped pieces for visual appeal. A sprinkle of vinegar at the end is a great finishing touch.

Slice meat into small pieces - you want to end up with about 1 tbs of meat, for one person - and fry over medium heat, with a tbs or so of oil if needed, until the fat is rendered and smells very fragrant. Turn up the heat a couple of notches, add one small sliced onion, and fry for a few seconds until it begins to soften. Add 1 medium sweet sliced pepper and fry together, stirring, until vegetables are cooked but not limp. Depending on how salty the meat is, you may need to add some salt. Sprinkle with vinegar, if desired, and serve.

French Toast

Wednesday, October 18, 2006

Fresh bread good. Stale bread better - and usually, way less expensive. There is nothing quite like pulling warm chunks off a fresh loaf to eat plain, but if you are going to do anything with the bread, even something as simple as slicing and toasting it, day old bread is easier to work with and is just as good as fresh. Dry bread absorbs the flavours of stuffing seasonings and bread pudding custards much more readily than fresh bread as well. One thing I really liked making this past summer was a bread salad using day old Parmesan sticks from my local bakery cut into pieces, toasted, and tossed with chopped tomatoes and a simple vinaigrette.

For French toast, beat two eggs with 2 tbs milk or cream in a shallow bowl and stir in 1 tsp vanilla infused sugar or plain sugar and half a teaspoon of salt. Coat four slices of at least day-old bread (I used whole grain bread) in the mixture, soaking it all up and wiping the bowl with the bread. Fry on both sides in a well greased pan over medium high heat. Eat with butter and jam or heated maple syrup - don't let cold, refrigerated syrup steal the warmth from your French toast. Serves 2.

Sophie of Sucré-Salé has a great looking oven baked, savoury version of French toast (Pain Perdu). I am really enjoying her blog - we don't usually associate French cooking with healthy food, but she is a dietician. I am planning to make her beet salad as well. Non-Francophones might be able to make it out with a page translate - pain perdu will come back literally as 'lost bread'.

Carrot and Apple Salad: Retro Recipe Challenge #3

Sunday, October 15, 2006

This challenge was far too fun not to accept: finding a recipe to blog that was originally published near the year of your birth. My first strategy was an Epicurious search for '1973', which yielded a pile of recipes from a House and Garden Drink Guide published in November of that year. There was Baltimore Eggnog, for anyone whom you might want to comatize with richness and alcohol. There was one cocktail named Between the Sheets, giving me a mental picture of some mustached, sideburned guy in a light colored, wide lapeled suit mixing up one of these...let's change the channel. One recipe, Shrimp with Avocados, was gorgeous but unfortunately not frugal. I then turned to the Edmonton public library catalogue for cookbooks published in that year, and came up with the dairy themed Cooking with Yogurt, Cultured Cream, and Soft Cheese. The author also had produced a book called Fondue, Flambé, and Side Table Cooking, which I am sure would have far more gems from the era.

The book has lots of recipes from before the fat phobic eighties like bacon cooked in sour cream or meats and vegetables covered with rich sauces. One I was happy to find was a grated carrot and apple salad. Carrot salad is less popular now but I love its brightness and crunch, especially in winter. The dressing has a good combination of sweetness, heat and sharpness as well - you could use some other heat agent like Dijon or black pepper if you don't have horseradish. I used apple cider vinegar but plain or other mildly flavoured vinegars like rice vinegar would work as well. The sesame seeds were not in the original recipe, but I could not resist adding them - I love carrot salad with raisins and sunflower seeds as well. Very seventies, yes.

Mix up dressing: 1 tbs vinegar, 3 tbs sour cream or lebnah, 1 tsp sugar, 1 tsp horseradish or to taste. Grate 2 large carrots and one large apple fairly coarsely. Mix with dressing and taste for seasoning balance. Sprinkle with sesame seeds and serve to 3-4.

Tag: RRC3

Upma

Thursday, October 12, 2006

Sometimes in a foreign country, a mouthful of a completely new dish changes your idea of comfort food forever. This happened to me in Korea eating sollong tang, a full bodied soup made mostly from bones that I've never been able to duplicate. I had the same kind of revelation more recently in India, where hotel breakfast buffets often included a plain looking porridge with spices called upma. My first bite impressed me so much I flagged a server over to ask how it was made, but we did not have enough language in common for me to learn very much.

Indian cooking has been the toughest for me to grasp, so far. The technique of toasting spices before using them is new to me, as well as many of the ingredients. While researching upma online, I found versions using different kinds of grains as well as bread and noodles, with quite variable seasonings and vegetables as well. (The first upma that I fell in love with had hardly any vegetables, but more peanuts and spices.) Many of the recipes did not make sense to me though - most called for a tablespoon or so of urad dal and channa dal. Yellow lentils - why two different kinds? And why such a small amount?

By this time I'd had enough theory and was ready to jump in and try it. I had channa dal and masoor dal (small red lentils) on hand, as well as some curry leaves (bought fresh from H&W but now dried) and black mustard seed. Ginger, garlic, mild peppers, and frozen peas rounded out the vegetables. For the grain I used cream of wheat, which I think is the same as semolina.

In one pan, I heated one cup cream of wheat over medium heat until golden and fragrant. Meanwhile, in the other pan, I heated a tbs of oil and added one tsp mustard seeds, ten curry leaves, 1/2 tsp cumin seed, 1 clove minced garlic, 1 tsp minced ginger, one tbs masoor dal, and one tbs channa dal. These should be toasted gently until they are brown and fragrant. (Mine got a little too brown due to not gentle enough toasting.) I then added half a chopped onion, half a cup of frozen peas, and two small chopped mild peppers to the spices and sauteed them for a minute or so, then added two cups of boiling water and let everything boil together for a couple of minutes. I then added the toasted cream of wheat to the spices and vegetables and stirred til it was the proper consistency. I had to add a bit more water, and salt to taste. I then stirred in about 2 tbs of chopped mixed nuts.

I discovered that the toasted dal did not break down into the porridge, but provided a crunchy contrast. The result was very good, but could use improvements. Next time I will most definitely use clarified butter instead of plain cooking oil for toasting the spices for a richer flavour. I think I would just use a double amount of channa dal next time instead of masoor dal, which were a little too small to provide a really satisfying crunch, and maybe add coconut or other vegetables.

Smoked Whitefish with Watercress on Bulgur

Tuesday, October 03, 2006


Pasta or rice covered with something in a white sauce is a classic frugal combination. The problem is that too often it is made to taste cheap, with pasty and stiff or flavourless sauce. I wanted to do an update using bulgur, which is my newest favourite grain - very fast to make with a bonus of fiber and flavour for less than 15 cents per serving.

A couple of days ago I made a version of this using canned salmon, but the canned fish broke down too much in the sauce. Smoked fish, while slightly more expensive, keeps its integrity much better and has that great bonus of smoky flavour. I got my smoked fish from a European grocery a few blocks away called K&K Deli, a great place to go for European preserved foods and smoked meats. The fish cost $2.52 whole and yielded about 3/4 lb of meat after the rather finicky process of boning it. I also steeped the fish skeleton for a couple of hours in 2 cups of warm milk to extract the maximum flavour. You can skip this step if you are short on time or if you are working with already boned fish.

I like to add lots of greens to the sauce - watercress was what I had on hand tonight, but a cup of frozen peas would work very inexpensively as well. You might choose to cook vegetables on the side instead. The right balance between watery or too-stiff sauce is important - I mixed the sauce together with cornstarch to the correct consistency before adding the fish and greens, since it's much harder to fix after the other things are added.

Bone one small smoked whitefish, or have ready 3/4 of a pound hot smoked fish in chunks. If desired, steep fish skeleton in 2 cups of milk over low heat for two hours and then strain milk, or just heat 2 cups of milk over medium heat. Chop 1 clove of garlic and add it to the simmering milk. Whisk 2 tbs corn starch into 2 tbs of water and add this to the milk, stirring, until sauce is thick. Stir in fish and 1 cup of chopped watercress (or 1 cup of peas), and heat gently til bubbling and flavours are mixed. Taste for salt. Meanwhile, put 1/2 cup of whole wheat bulgur with 1 cup of water and a few grains of salt in a vented container in the microwave and cook for 2 1/2 minutes, until bulgur is fluffy and water is absorbed. On a plate, mound bulgur with a hole in the middle and spoon in the fish sauce. Serves 2.

Apple and Raisin Cobbler with Almond Biscuits

Saturday, September 30, 2006


Autumn always feels like the right time to use apples - their reds, golds, and greens reflect the intensified colours on the trees. I had some Jona Golds and Granny Smiths and wanted to do something different with them than my usual fruit crisp. For once I didn't have lemons on hand - lemon juice is often added to apple desserts to sharpen them and prevent the fruit from browning - but I did have apple cider vinegar. I also wanted to use up some raisins leftover from making granola and part of a tube of almond paste, so settled on a cobbler with almond flavoured biscuits cooked on top. I like the cobbler method of precooking the fruit before adding the biscuits because you have a chance to taste and fix the fruit mixture before baking the final dish.

Peel and slice eight apples into a baking dish. They can be any variety, but try and use more than one kind of apple if you can. Toss the apples with 2 tbs corn starch, 2/3 cup dark brown sugar and 2 tbs apple cider vinegar as you go. Add 3/4 cup raisins and 1 tsp almond flavouring. Can use a tbs or so of Amaretto if that is what you have on hand. Cover and bake for 20-25 min in a medium oven, about 350 deg F, until fruit is tender. Taste and adjust for sweetness and seasoning. (Also, if you are using a very shallow pan, you might need to add some water.)

Meanwhile, mix 1 3/4 cups of biscuit mix with 2/3 cup of milk. (No biscuit mix? 1 1/2 cups of flour, 2 tsp baking powder, 1 tsp salt, 2 tbs butter worked into dry ingredients.) Crumble 1/4 lb almond paste into dough and mix well, adding a bit more milk if dough becomes too stiff. Drop by spoonfuls on top of hot fruit mixture. Smooth tops of biscuits with butter and sprinkle with more brown sugar or crumbled almond paste. Return baking dish to oven and bake uncovered for 15-20 minutes, til biscuits are just cooked.

This ended up feeling very English, for some reason - I had the desire to pour custard overtop. I ate it with lebnah and it was fantastic.

Rosehips

Monday, September 25, 2006

The wild rose is the floral symbol of Alberta, my home province, and grows everywhere. The North Saskatchewan River and several smaller creeks cut right through Edmonton with big tracts of mostly undisturbed bush alongside them, so the rosebushes with their berries are pretty easy to find even in the city. I picked these along Whitemud Creek in the south. Except for their beauty, they are not as fun to pick as other berries - they don't grow in nice clumps like saskatoons, and the plants are always pricking you without being as yummy as their relatives the wild raspberries. (Some people enjoy these vitamin-C packed fruits fresh off the bush, but I don't care for the mouthful of seeds and fibres inside.)

The best thing to do with these is to preserve them by drying until wrinkly for making tea. Spread rosehips in a single layer on a pan in a very low oven, even as low as 100 degrees F, and dry slowly. This is one of the best smells you can have in the kitchen. They can get a little toasty but you don't want to overdo it and brown them or the tea will be bitter. To make rosehip tea, put a couple of handfuls of dried rosehips in a 1.5 l saucepan mostly full of water and bring to a rolling boil for several minutes - you want to really cook them, not just infuse them. Strain into a teapot or cups and serve. You can continue adding water and making tea with the same berries for a couple of days. I loved this with honey when I was little and still love it.

Domestic rosebushes can be harvested like this as well, though the fruit is bigger and you should avoid plants that have been sprayed. Just resist the urge to dead head the roses and they will produce the fruit.

Spaghetti Squash (Not a) Carbonara

Tuesday, September 19, 2006
Few people get really excited about eating squash, but spaghetti, butternut, acorn, and kabocha squash are amazingly good when fresh. Baking and eating them simply with butter, salt, and pepper is one of the great things about autumn.

Though Italy is not a place I visit often, culinarily speaking, I love a carbonara. I love how the eggs are cooked into a sauce simply by being stirred into sloppy wet, freshly cooked pasta and how they absorb and amplify the bacon and cheese. This was going to be a carbonara, but the deli-end capicolli I was planning to use had lost its freshness so I used dried shrimp instead. Tiny dried shrimp are similar in colour, texture, and salty intensity of flavour to bacon bits but of course make a completely different effect. I added chopped peppers because I had them on hand; I probably would have left them out of the carbonara.

For this squash version of spaghetti (not a) carbonara, the sauce is cooked separately before being combined with the squash, which is too delicate to endure the energetic tossing that you would do with pasta. You can very easily overcook the sauce so that it is full of stiff pieces of egg, or overcook the squash into a lump that does not separate into spaghetti. If this happens and you are worried about presentation, just mix everything together into a casserole topped with more cheese and bake til the cheese is golden. I have a feeling many baked pasta dishes originated this way.

Put half a spaghetti squash cut side down on an oiled baking sheet and bake in a medium oven until just tender and you can separate the flesh into strands with a fork. This will take about forty minutes; start checking it after half an hour. Meanwhile, mince one pepper and two cloves of garlic to about the same size as the shrimp you are using, and cook in a little bit of oil with one and a half tablespoons of tiny dried shrimp. (For carbonara, just finely dice two strips of bacon and cook it without any oil.) When vegetables are tender lower heat and slowly stir two eggs into this mixture, scraping bottom of pan frequently, until the eggs are very smooth and thick. Carefully stir in strands of squash and one and a half tablespoons of grated parmesan until coated. Add salt and fresh ground pepper to taste and serve to one person who has been running around without eating all day or two people with some really good bread and butter.

Candied Nuts

Wednesday, September 13, 2006

Some people fantasize about performing an outstanding athletic feat. I see myself spinning smooth, glossy, chewy caramel out of butter, sugar and cream or forming perfectly textured chocolates out of top quality couverture. Not going to happen - at least not without a lot more practice and study than I have put into it yet, since candy making requires a precision and attention to detail that do not come naturally to me in the kitchen. These candied nuts are pretty forgiving - still delicious if the coating is a bit soft or is on the crunchy side. I like to have them on hand during road trips, in packed lunches, or to fill the gap before the next meal. They are great on ice cream or stirred into granola as well.

Bring to boil in large shallow pan 1/4 cup corn syrup, 1/2 cup brown sugar, 2 tbs butter, and 1/2 tsp fine to medium salt. Add 4 cups nuts and stir for three minutes. Spread nuts on two oiled pans and toast in a medium oven, stirring once, for about ten minutes til bubbling and very fragrant.

Ratatouille

Wednesday, September 06, 2006


When I mixed this together I had plans to make an entirely different dish, but my vegetables on hand were eggplant, tomatoes, onions, peppers, and half of a huge greenish curved ridged thing that my sister referred to as a 'zucchini' when she left it with me. At times ingredients will take you where you didn't know you were going and this collection insisted on being made into ratatouille.

This classic has many interpretations - stove top, oven, even grill. I like it quite dry, so I start the vegetables on the stove top til browned and then finish them in the oven. This time I did not have black olives, which improves it immensely - tried capers as a substitute for the olives, but I recommend sticking with olives. If you don't have pre-mixed herbes de Provence, use a mixture of rosemary, thyme, marjoram, basil, oregano...at least make sure there is a good note of thyme or rosemary. To my nose, they are the essential French smelling herbs.

Cut into medium dice one eggplant, three medium tomatoes, one large onion, one large red pepper, and two small zucchini (or half a teenage mutant ninja zucchini). In a very hot, nearly dry frying pan slightly char the peppers, zucchini, eggplant, and onion in batches, emptying each batch into a wide roaster. Add tomatoes to roasting pan along with two handfuls of black olives, if you have them, and drizzle vegetables with 2 tbs olive oil, 1 tbs salt, 4 cloves chopped garlic, and 1 tbs herbes de Provence. Roast in a low oven for forty minutes or so until vegetables are all tender and the flavours are blended. Serve with something to soak up the juice, like rice or couscous. Eat hot like this or at room temperature; it doesn't really like to be reheated.

Dips: Lemon Chevre Dip

Sunday, September 03, 2006

Buying marked down dairy from the organic store was starting to crowd the fridge so I took advantage of a party invitation to use some of the excess lusciousness. I had a fresh batch of homemade chevre, flavoured with lemon zest as an experiment - hated to throw out the zest after using the juice to make the cheese. I also had plain yogurt thickened by draining through a cloth for several hours. (For this recipe you can use ordinary yogurt, because the dip ended up on the thick side - almost a spread.)

The cheese I made turned out lemony but a bit flat tasting so I stirred it into a dip using 3/4 cup of chevre (plain is fine), 1 tsp salt, 1/2 cup extra thick plain yogurt, and 1 tbs dried oregano (thyme would be even better, if you have it). I also stirred in half a lemon's worth of freshly grated lemon zest. I gave the tartness dial another crank with a sprinkle of sumac powder just before serving, though this could be left off. Let sit for twenty minutes or so at room temperature before serving and eat with pita chips (scroll down to croutons in fatouche post) or cut raw vegetables. Also amazingly good with the grapes in the picture.

Dips: Chipotle and Fresh Salsa

A couple of my friends who will be starting their next years of elementary and junior high in a few days had a cooking day with me recently. We had a great time making chips, dip, and lime tarts. The dips were two of my favourites - chipotle and fresh salsa.

Chipotle Dip

One theme I am going to explore a bit more once we get into the colder weather is the power of seasonings and flavour agents to inexpensively transform ordinary food. This chipotle dip is a great example. One small can of chipotles in adobo is enough for several batches of this fiery and aromatic dip. You mix 3/4 cup each mayonnaise and sour cream (or thickened yogurt), stir in one or two chopped green onions, and one or two chipotles with a bit of adobo sauce depending on how hot you want it. My friends liked it more on the mild side. Salt to balance the flavours. I've also made this with finely chopped white onion and parsley, when green onions were too expensive. I love this dip with nearly anything; I've been known to take it to barbecues and slather it on hamburgers, and am scheming to try it stirred into canned fish soup, à la rouille.

Fresh Salsa

Fresh salsa is more of a method than an exact recipe. Ours had 2 tomatoes, 1 peach, 1/2 small red onion, 1/2 bunch cilantro, juice of 1 lime, and salt. The vegetables and cut fruits should be in a very fine, uniform dice - a bit finer than pictured is ideal. This is most attractive and allows the flavours to blend easily. You then adjust the lime juice and salt to balance the sweet, tart, hot, and salt elements. I wanted to add a jalapeno but my friends voted me down.

Spiced Peaches (Sugar High Friday #22)

Thursday, August 24, 2006


My mother cans every year and has an enviable repertoire of jams, jellies, pickles, fruit, vegetables, and meat. She always kept us kids out of the kitchen and away from the pressure cooker and boiling sugar during the process, and as a result I left home not knowing how. I'd always given her a hard time about failing to pass on this vital life skill until she replied that it is not that hard and I should be able to figure it out. With a frugal themed blog, I could not resist trying it for the Can You Can episode of Sugar High Friday.

Spiced peaches do double duty as a sweet or as a relish - the heat of the spices makes up for the lack of a sour element.

Boil together 1 cup of sugar and 1/2 cup of water with 6 cloves, 6 peppercorns, 6 allspice berries, and two cinnamon sticks until the sugar is dissolved. You can mix and match other whole spices; grains of paradise or ginger would work well. Make sure the cinnamon sticks are short enough to fit into your canning jars. Wash an orange and zest in long strips; add zest to syrup. Peel 1 lb firm peaches and cut into chunks; cook in the syrup for a few minutes until tender. (You want firmer peaches for this; use the softer ones to eat fresh or make soup.) Meanwhile, sterilize jars and lids and start water boiling for water bath.

Place cinnamon sticks in clean sterilized jars and coil in the orange zest. Pack in the peaches and whole spices and spoon the hot syrup over the fruit, leaving a couple centimeters of head space. Run a spoon up and down the sides to remove any air bubbles and partly tighten the lids. Process in water bath for fifteen minutes; remove jars and firmly tighten the lids. I was thrilled to hear the pop that meant the jar was sealing. This is a very small batch; it makes a couple half pints with a bit left over for your cereal the next day.

Qing jiao yu mi (Corn With Peppers), from Land of Plenty

Tuesday, August 22, 2006

The best cookbooks are those that teach you to cook with your senses. Far too many use a formulaic approach that outlines equipment, specific ingredients, precise cooking times, and precisely nothing that would give you a deeper understanding of the food and process. I recently picked up Fuchsia Dunlop's Land of Plenty, a book about Sichuan style cooking. It is full of not only good recipes, but fascinating information about this central Chinese province as well as cooking and eating habits of Sichuanese.

My exploring this book coincided with gorgeous fresh corn on special nearly everywhere as well as the annual pepper event at the Italian Centre Shop, one of the best places to shop for groceries in Edmonton. Each year in late summer you can get a variety of BC peppers for around 1.50 a pound. A jumble of various sweet and hot varieties take up most of an entire produce stand and you can smell it from around the aisle.

This recipe I found in the vegetable chapter of the book- fresh corn and peppers, sauteed in oil with salt. Such a prosaic combination - the very opposite of my usual idea of Sichuan cooking - gave me pause. However, the book's engaging description of the dish aroused my curiosity. It is also extremely fast to make, with a couple minutes chopping and five minutes or so frying. The recipe mentions you could make this with frozen or canned corn but it will not compare to sauteed fresh sweet corn, and I would agree that the appeal of the finished dish, which is much more than the sum of its parts, is mainly due to the freshness of the corn.

Cut the kernels off of two fresh cobs of corn. Chop coloured peppers into small dice similar to the size of a corn kernel, in quantity to give an attractive colour contrast in the dish (I used one green and one red pepper, both very small) and saute in 3 tbs of hot oil, adding salt to taste, until vegetables are tender but not mushy. The book encourages adding plenty of salt - about two teaspoons was enough to brace the sweetness of the corn I used.

Weekend Cookbook Challenge #8 entry, co-hosted by Ruth of Once Upon a Feast and Sara of i like to cook. Theme is Foreign Food. See entry details here.

Peach and Canteloupe Soup

Saturday, August 19, 2006


This is a cool and refreshing first course or summer dessert. You need really dead ripe fruit- that bag of marked down peaches, for example. The canteloupe should be soft as well, nearly translucent. Some really ripe peaches will peel easily by just lifting the skins off with a knife, but if that does not work plunge them in boiling water for a minute, then colder water so they are cool enough to handle. The skins should slip off. The proportions don't really matter, but I used one small canteloupe and four peaches. The fruits will give out a lot of juice as you peel and slice them into a blender, making a spa treatment for your hands. Try and capture as much juice as you can in the blender. You might need to blend in two batches.

Stir in 3/4 cup of milk, cream, soymilk, buttermilk, whatever you have. If you have almond flavouring or Amaretto on hand add some to taste but don't go out and buy it for the sake of the recipe. (Flavouring should intensify the fruit; should not be enough to give the soup a strong almond note.) Chill until very cold and garnish with berries, if available, or a spoonful of sour cream.

Another entry for ARF/5-a-day over at Sweetnicks'. Check for the roundup on Tuesday.

Poutine with Mole

Saturday, August 12, 2006

Belly bomb alert! Poutine, which comes from Quebec, is a pile of French fries and cheese curds smothered with with gravy, barbecue sauce, or other concoctions such as bolognese sauce. I've wanted to try it with mole for a long time and finally made it this way on the long weekend when my sister came to visit. I used a mole verde mix for the sauce, prepared quite thick with chicken stock. The mix was Doña Maria brand and very salty; Rogelio is better if you can find it.

Cooking fries in animal fat, like beef fat or duck fat, gives them the best flavour. I got a couple kilos of beef fat free from Sunterra market, just by calling ahead, and rendered it in the slow cooker. I should have followed a more elaborate rendering process because the resulting lard was full of suc - yummy, but complicated the frying. (Do we have a word in English for suc? The sticky, aromatic brown stuff that clings to your pan surfaces?) I mandolined starchy baking potatoes into skinny fries and soaked them in cold water, then heated the lard over medium high heat and began parcooking the fries.

French fries should be cooked once at a lower heat to cook them through and then again at high heat to crisp them. If you have a deep fat fryer, the low temperature should be about 300 deg F and the high temperature about 375. I was using a stove top, so for me the low temperature made the fries look like they were relaxing in a jacuzzi and the high temperature immersed them completely in bubbling oil. I thought that with my skinny cut fries double cooking would not make much difference and tried to cook one batch in hotter fat all at once, but they turned out limp. The double cooked fries, salted, were wondrous. We ate them as poutine, then with ketchup and other dips.

As for the poutine, the final combination was very good but still could use some tweaks. The thin, crispy fries did not hold enough heat to melt the cheese (used chevre) into submission and the sauce was a bit too thick, so the glommed-together quality of true poutine did not get a chance to develop. Next time will try thicker cut fries, and maybe a different kind of mole, like chocolate or pumpkin seed. The cheese element definitely needs more attention as well - think queso fresco would work really well with the mole, or maybe a sharp feta if I can find one that is melty enough.

Masala Chai and Coconut Ginger Matcha Ice Creams

Tuesday, August 08, 2006

My first experiments with ice cream made me eager to try a few other flavours. The first was the chai ice cream (shown) mentioned in the original post. The second was to add the bite of ginger to the coconut matcha. For these I switched to honey for a sweetener since I am saving sugar for baking. You can use a slightly higher quantity of sugar to match the sweetness.

The masala chai flavoured ice cream was quite straightforward - steep two tablespoons of chai tea and spice mix in two cups of heated half and half, until strongly flavoured. Sweeten to taste - I ended up using one and a half tablespoons of honey. Chill and strain before freezing. Both Masala Chai and Culina Oolong Chai blends from Cally's Teas gave good results, with both the tea and spice coming through very well.

For coconut ginger matcha, heat up a 14 oz can of coconut milk (I used 55% coconut milk) and dissolve one and a half tablespoons of matcha powder. Finely chop a two inch piece of ginger - use more than you think you need, because freezing dulls flavours - and mix in. Simmer for a couple minutes and use a potato masher or other tool to squeeze out the ginger juice into the coconut and matcha mixture. Sweeten with two tablespoons honey, or to taste, and chill and strain before freezing.

Blueberry Soup with Polenta and Chevre

Thursday, August 03, 2006

Seems like everyone is blogging about blueberries these days. Love it. Just got back from a BC trip with two quarts of blueberries that have the most intense blueberry flavour I've ever tasted from cultivated blueberries - almost like blueberry liquor.

This soup began as I was throwing a bowl of things together to eat on a busy night. I decided to use some blueberries I had stewed several days earlier. (Had intended originally to mix them with fresh ones for a pie, but hadn't yet been able to get the fresh ones and finish the pie.) To give the dish of stewed berries some body I added polenta. For protein, I then crumbled some homemade chevre on top. The results were distractingly good.

If you have to buy all the elements it is expensive to make, but hopefully you have blueberries to use up or have access to wild ones. Cream cheese, a spoonful of sour cream or lebnah, or any mild cheese with a slight tang would all work very well if you don't have chevre on hand.

What made this combination really zing, I realized, was making the blueberry mixture with lemon sugar (sugar infused with scrapings of lemon zest) and using cheese made with lemon juice. The citrus sharpness throws the flavour of the berries into relief and so is a traditional addition to blueberry or saskatoon dishes. Otherwise, the blueberries do not need much. You start them with a little water and sweeten them to taste - my soup version of the berries used a lot less sugar than my original pie version. Caramelizing the polenta gave the dish character and a temperature contrast.

Blueberries: Put 1/2 cup of water in a medium saucepan with one and a half pint baskets of blueberries and simmer til they are juicy. The water is just to prevent the berries from burning before giving up their juices. You can add more if you want a thinner soup - blueberries cook up quite thick and you shouldn't need to add any thickener. Add one half lemon's worth of juice and zest. Make yourself a cool drink with the other half. Add sweetener to taste, starting with a tablespoon or so - maple syrup, sugar, or honey would all work well. Cool and refrigerate. This much will make a breakfast/late supper dish for two, or you could serve it in smaller dishes as shown to up to six for dessert.

Polenta: Use a chunk of cooked polenta about the size of two decks of cards. Cut in cubes and brown in some butter and sugar or maple syrup until the polenta is heated through and has a crispy brown surface. Use medium heat because the sugar burns fast.

Chevre: Crumble one tsp of chevre per dessert serving, as shown, or up to two tablespoons for a bigger bowl.

Assembly should be quick, since you should eat while there is still a good contrast between the warm polenta and cold soup - take a bowl of soup out of the fridge, tip the cubes of polenta on top of it, and sprinkle with the chevre.

Another entry for Sweetnicks' ARF/5-a-day. Roundup every Tuesday.

Fan qie chao dan (Tomatoes and Eggs)

Wednesday, August 02, 2006

This comfort food from China with basic elements of tomatoes and eggs scrambled together is almost easier to make than to eat.

More elaborate preparations call for the tomatoes to be blanched and peeled so that you do not end up with tough pieces of tomato skin throughout, but I find that as long as you slice the tomatoes thinly the skins are not a problem. You could also add herbs - garlic fried for a few seconds before eggs are initially added to the oil, or finely sliced basil or oregano added during the final cooking stage. A scattering of chopped green onions finishes the dish nicely too. The oil has been reduced as much as I am comfortable; if you want to reduce it more keep in mind that it will compromise the dish.

Use two large eggs for every one large tomato. Heat at least 3 tbs of oil in a wok or frying pan over medium high heat and cut tomatoes in thin pieces. When the oil has come to a shimmer pour in the eggs and cook for several seconds until they are mostly set but still very soft. Remove eggs from pan and put in the tomatoes; cook for about a minute and a half until they are heated through and releasing their juices. Pour eggs back to the pan and mix them into the tomatoes with a generous amount of salt and pepper. The seasonings here may seem common but getting the amounts right makes the difference between an ordinary and lick-the-plate dish. Let the eggs cook just a bit more in the tomato juices and serve with toast or leftover rice.

My favourite way to eat this is over wilted spinach drizzled with sesame oil. (Arrange one handful of spinach on a plate and microwave for approximately one minute until limp but still bright green. Drizzle with one tbs sesame oil.) All ready in less than five minutes, faster than any fast food.

Land of Plenty by Fuchsia Dunlop is a fantastic cookbook that I am now reading with recipes from Sichuan province. She includes a recipe for fan qie chao dan that differs slightly from this one and then turns the same ingredients into a soup by cooking the eggs in one piece, like an omelet, then adding stock and some greens along with the tomatoes to make soup. With plenty of garlic, this would be great to make for someone under the weather.

The Basics V: Polenta

Thursday, July 13, 2006

When most of your food budget goes to glorious summer produce, eating well is still easy when you have a few inexpensive essentials on hand: grains such as couscous, rice or barley; cheese or tofu; and some cooked beans in your fridge. For the grains element, a few posts on a Southwestern gluten free blog recently reminded me of polenta's versatility. My first attempts to make polenta managed to be mushy and lumpy at the same time but still tasted great. I also came to appreciate how bright yellow polenta in a cast iron pan helps focus blurry first-thing-in-the-morning eyes and is a great backdrop for black beans or dark red kidney beans and veggies.

This slow cooker recipe helped somewhat with the textural problems. Slow cookers are usually associated with winter but are ideal for cooking in the summer, especially when they can sit outside.


1 part corn meal - I used a medium fine grind
4 parts water
Salt, 1-2 tsp
Slow cooker on low overnight

In the morning, shape polenta into a log or brick and store in the fridge to use as needed within one week.

Potato and spinach soup


At a certain point in summer, last year's potatoes are getting duller and duller while the baby delicate new potatoes are an occasional luxury. This soup is a good way to use older potatoes that are softening in storage. As for the greens, I used to view spinach as someone with many attractive qualities but one or two quirks that annoyed me so much (like that film on my teeth) that I was hesistant to make friends. We bonded mainly through this soup. You can also use other greens such as lettuce leaves, parsley, cilantro, or green onion tops - this is a good clean out the fridge soup.

Dice half a large onion (or 1 med) and a couple of stalks of celery and saute gently in a saucepan with some salt over medium heat for several minutes until soft. Add two cups of chicken stock and one large diced potato and boil til potato is cooked. Blend soup in two batches just til pureed - overblending will make the potatoes gummy. (My own preference is to leave it slightly chunky.) Also blend one cup of milk with three handfuls of spinach. Stir spinach and milk mixture into soup, taste for salt, and heat through with care; if you cook the soup too much after adding the spinach the attractive green colour will dull.

You can use skim or whole milk, canned evaporated milk, and soy though you could also leave it out if you don't have any of these on hand and just blend the leaves at the same time as the rest of the soup. Garnish with grated or crumbled cheese, if available.

See Sweetnicks' ARF/5-A-Day Tuesday roundup for more great ways to eat fruit and vegetables.